Deploy Your First App
Deploy your first app on Sealos App Deploy with one exact walkthrough using nginx:latest, port 80, and a public URL.
This is the start-here App Deploy tutorial for new users.
Follow this page when you want the shortest zero-to-one path to one public single-container web app on Sealos.
By the end of this guide, you will deploy nginx:latest, wait for the instance to reach running, and open its public URL in your browser.
Before You Begin
Use this tutorial if all of the following are true:
- You can sign in to the Sealos console.
- You want one public single-container web app, not a multi-service setup.
- You will use the exact demo image
nginx:latest. - You will expose container port
80to a public URL.
For this first deploy, skip startup commands, environment variables, config files, persistent storage, scaling rules, and multiple ports.
The goal here is first success, not full configuration coverage.
What You Will Deploy
This tutorial uses one exact demo so you do not have to choose values along the way.
You will deploy a small Nginx container as a fixed one-instance app and verify that its welcome page opens from a browser.
| Field | Value |
|---|---|
| App name | nginx |
| Image | nginx:latest |
| Deploy mode | Fixed instances |
| Instance count | 1 |
| CPU | 0.1 |
| Memory | 128 MiB |
| Container port | 80 |
| Public access | Enabled |
Step-by-Step Deployment
1. Open the Sealos console
Open Sealos Console and sign in.
Then open the App Launchpad module from the workspace.
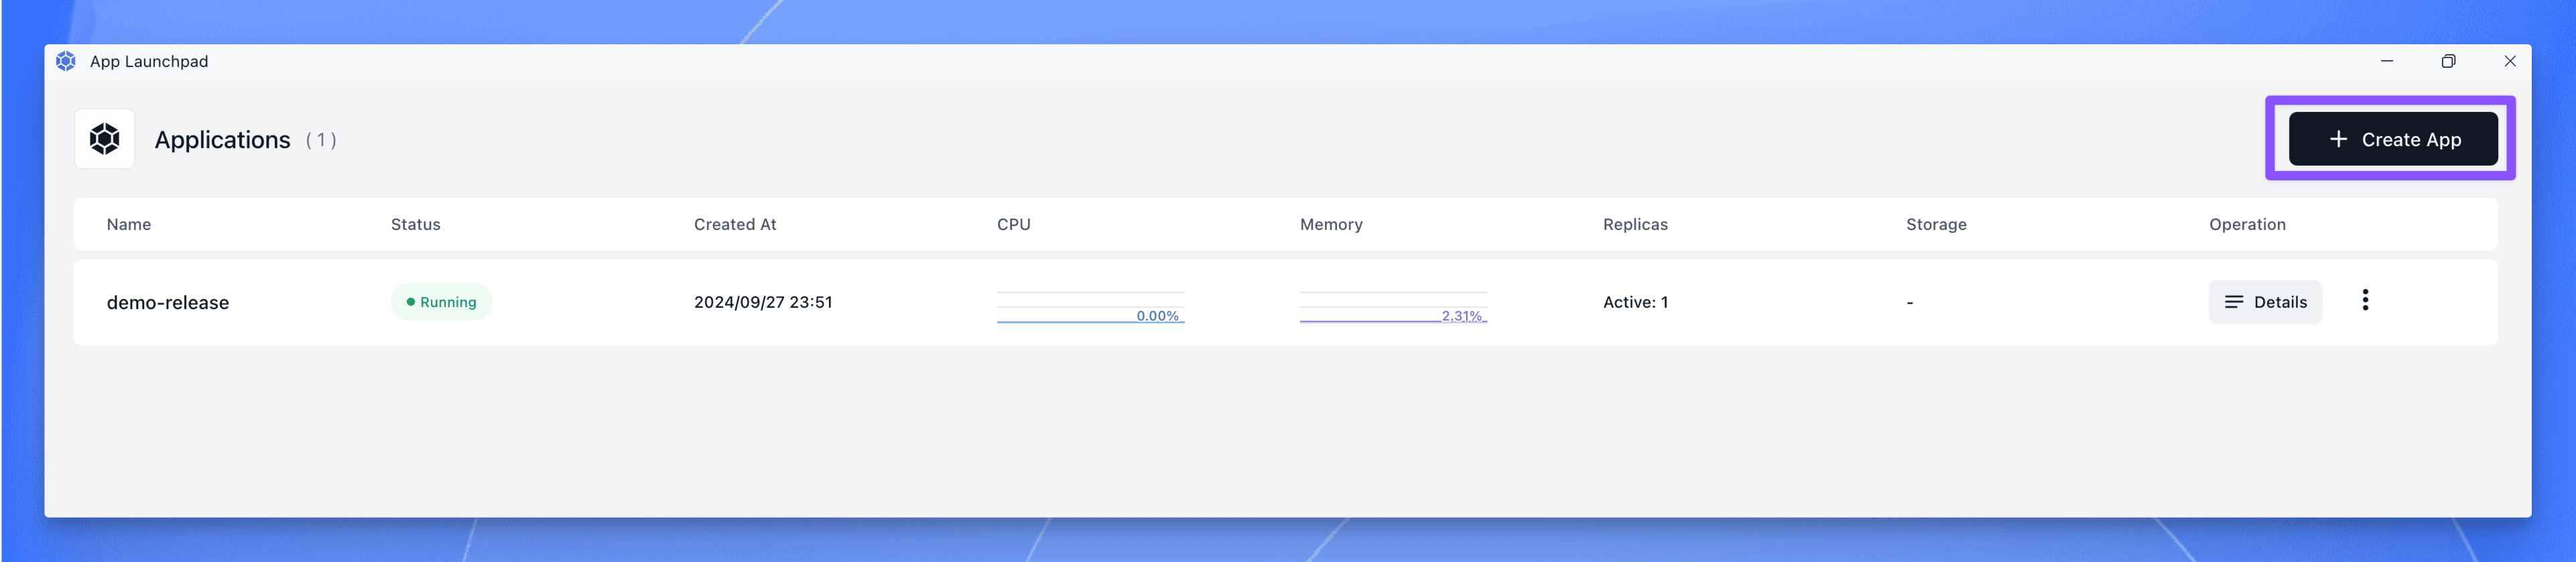
2. Start creating the app
Click the button or action that creates a new app.
After you submit that action, wait for the app creation form to open.
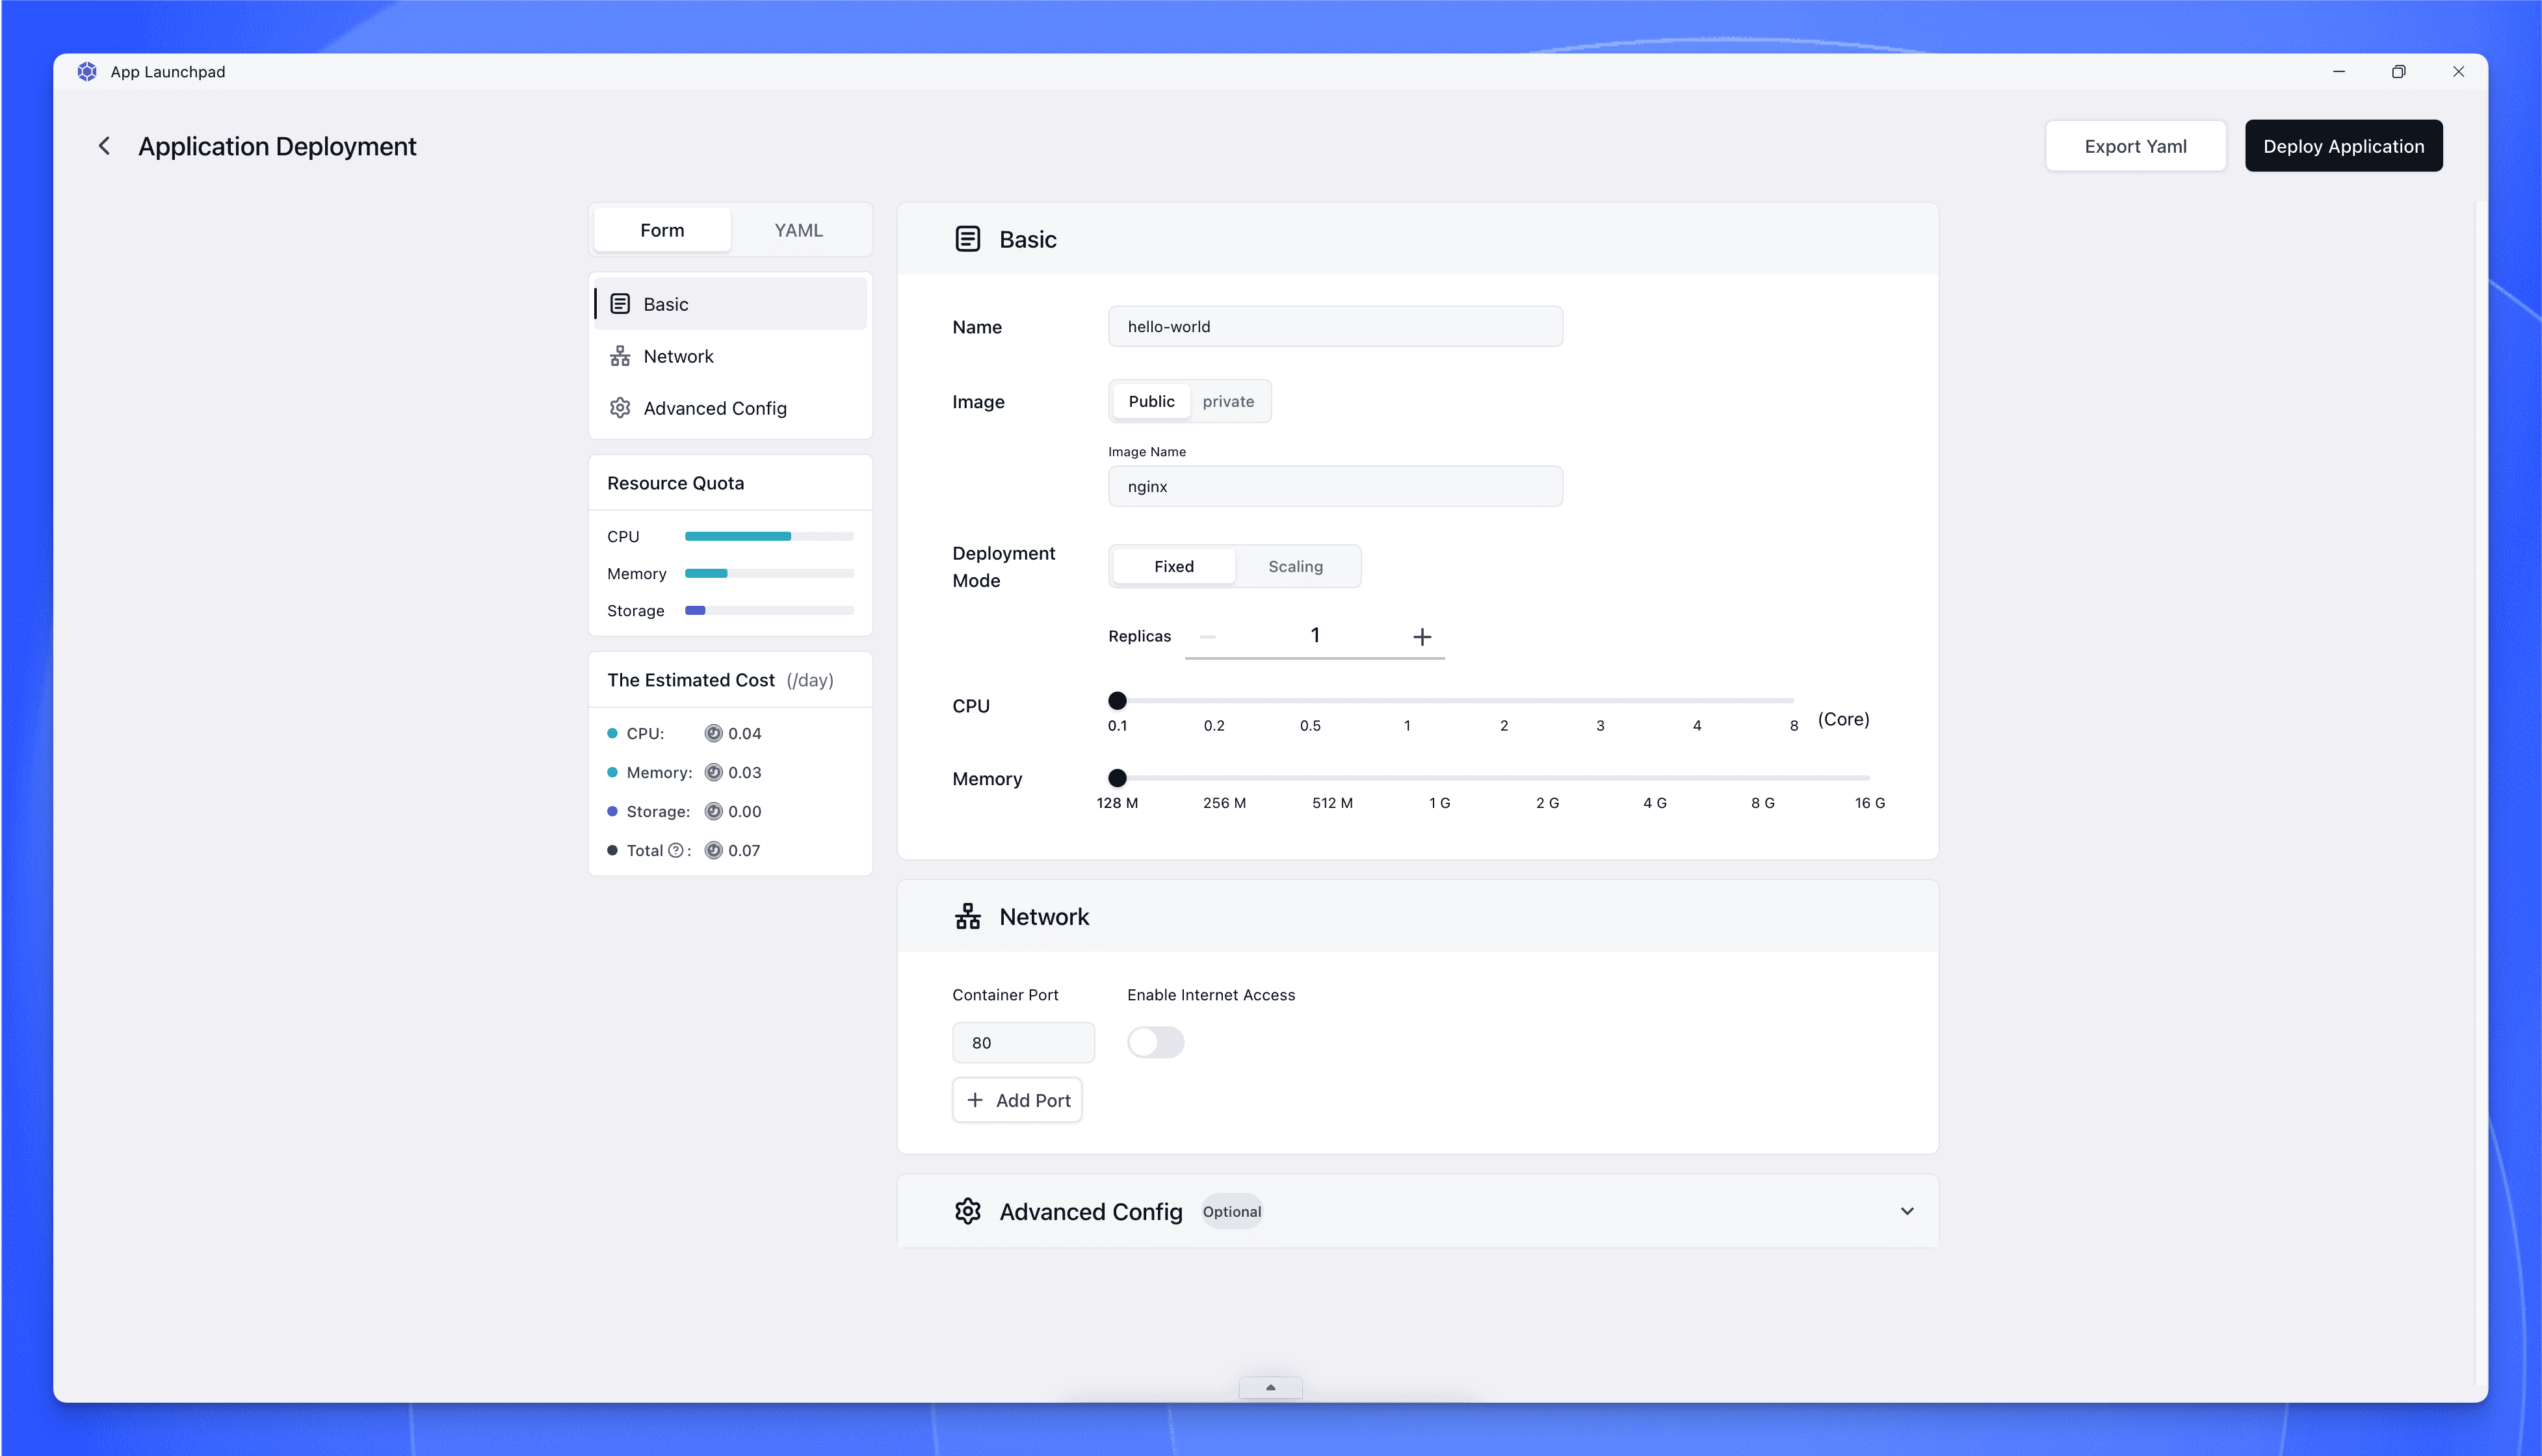
3. Fill the basic app information
Set the app name to nginx.
Set the image to nginx:latest.
Use the exact image value in this guide.
Changing the image means you may need different ports, commands, or config later.
4. Choose one fixed instance
Set deployment mode to a fixed number of instances.
Set the instance count to 1.
Keep this tutorial on the simplest path.
Do not enable scaling yet.
5. Set small compute resources
Use a small resource allocation such as 0.1 CPU and 128 MiB memory.
That is enough for the Nginx demo page in this walkthrough.
6. Configure networking
Add container port 80.
Enable public access so Sealos can generate a public URL for the app.
Use port 80 exactly for this first deployment.
The verification step later assumes this port is the one exposed to the browser with public access enabled.
7. Leave optional sections empty
Do not set a startup command.
Do not add environment variables.
Do not add config files.
Do not add persistent storage.
Those fields matter for later jobs, but they are intentionally outside the happy path for this first deploy.
8. Deploy the app
Click the deploy action in the form.
After you submit the form, wait for the app detail page to open.
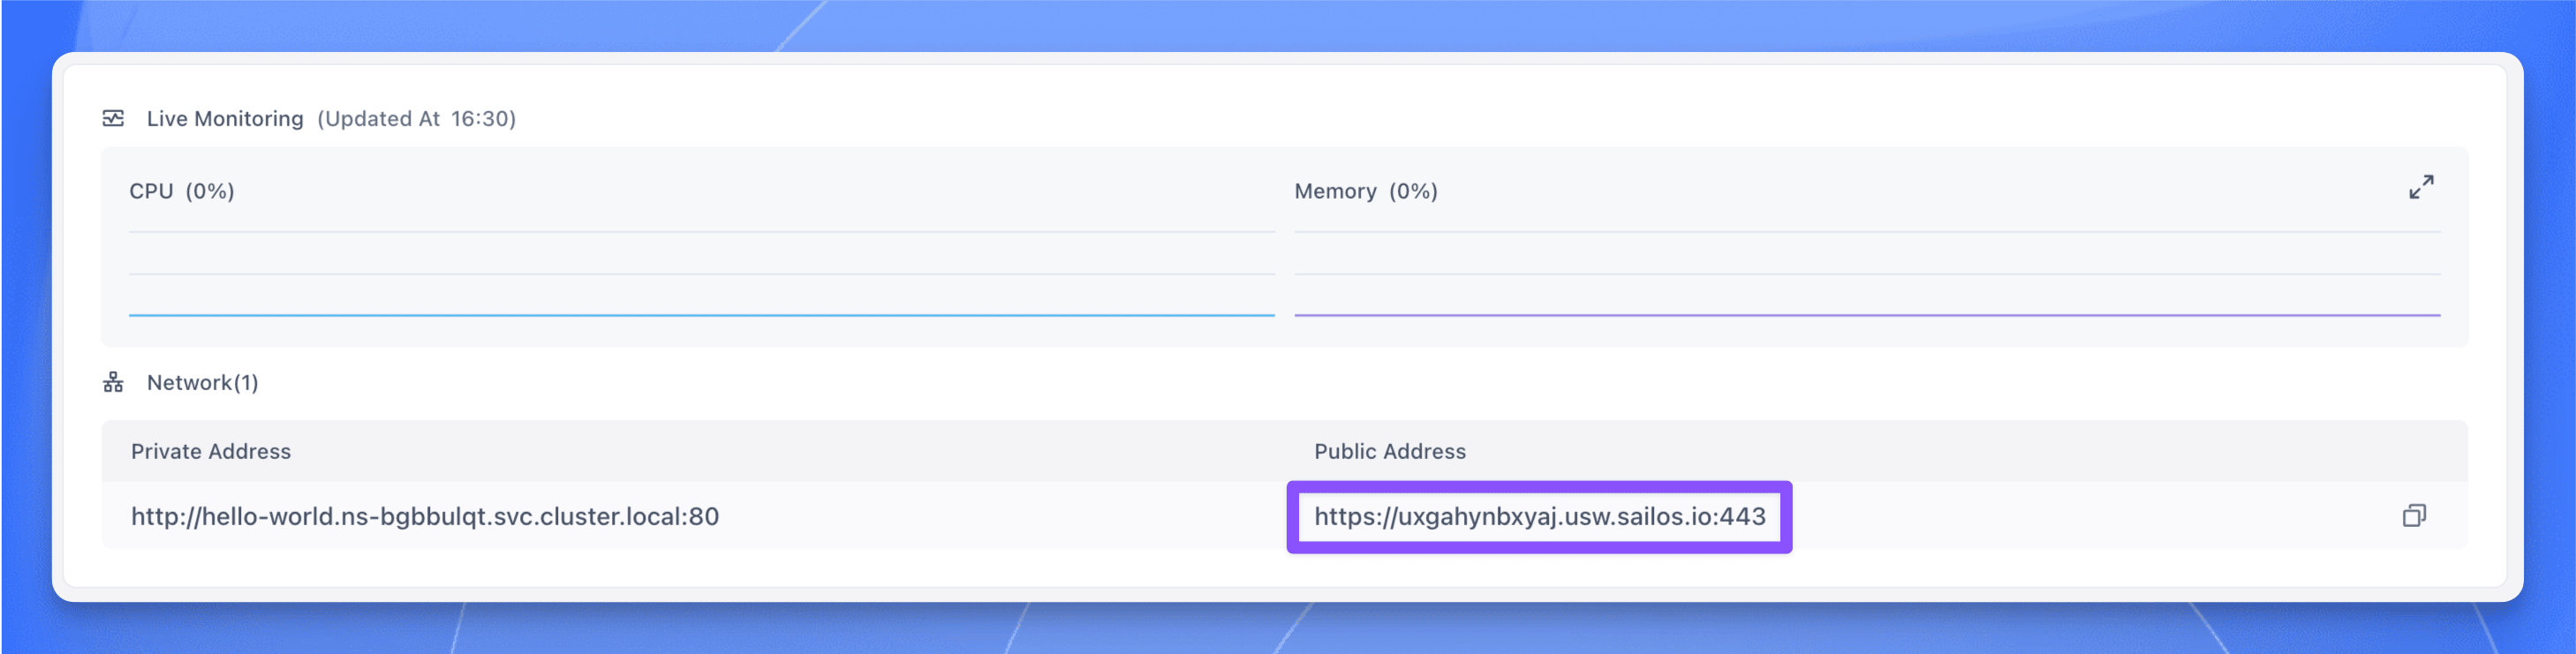
9. Wait for the app detail page to show a healthy instance
On the app details page, watch the instance list and status.
Wait until the instance state becomes running.
If this fails, see App Does Not Reach Running.
Verify the Deployment
Use this checklist before you call the deployment complete:
- In Sealos, the instance status is
running. - The app details page shows a public URL.
- Opening the public URL loads the Nginx welcome page in your browser.
- The welcome page is the demo page for this tutorial, so you know the container is reachable from the public internet.
If this fails, see Public URL Does Not Open.
For this walkthrough, the correct combination is container port 80 with public access enabled.
Success
Your app is running.
Your first app is deployed on Sealos App Deploy.
The instance is healthy in Sealos, and the app is reachable through its public URL.
If you ever need the shortest App Deploy start-here path again, come back to this tutorial and reuse the same exact values.
Next Steps
After your first successful deploy, move to one focused App Deploy job at a time:
- Domains and Public Access
- Environment Variables
- Config Files
- Persistent Storage
- Update and Redeploy
- Scaling
- Ports and Networking
This page is the canonical first deploy path.
After this point, use the guides above instead of reopening every deployment option at once.
Explore with AI
Get AI insights on this article
Share this article
Last updated on